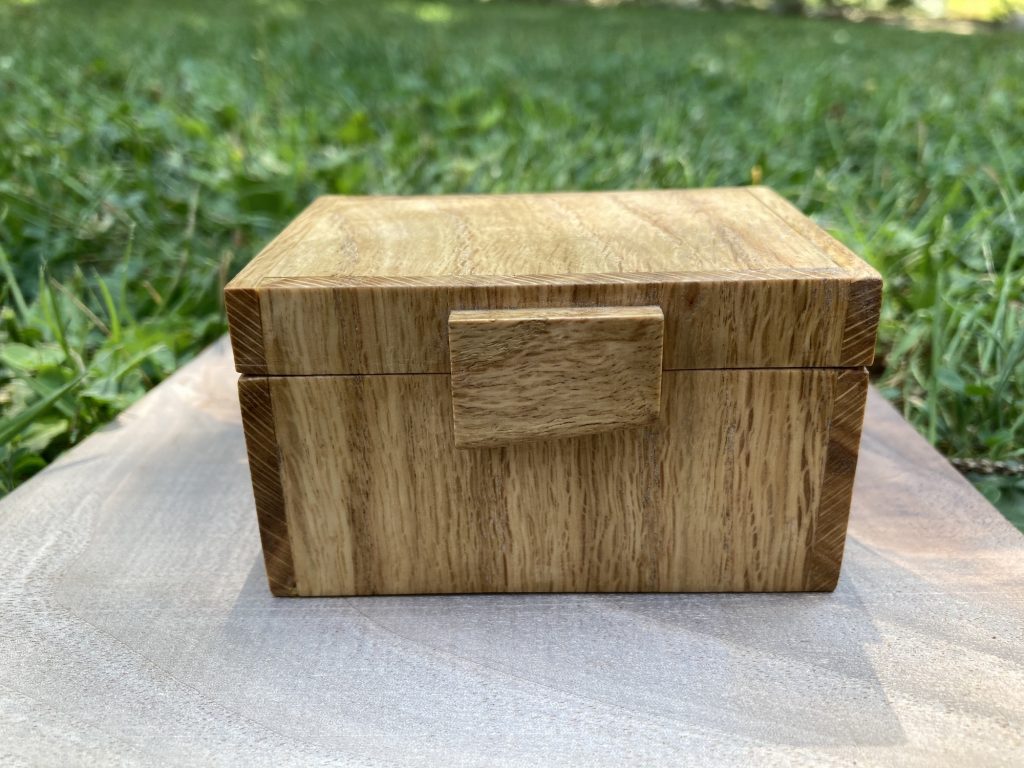
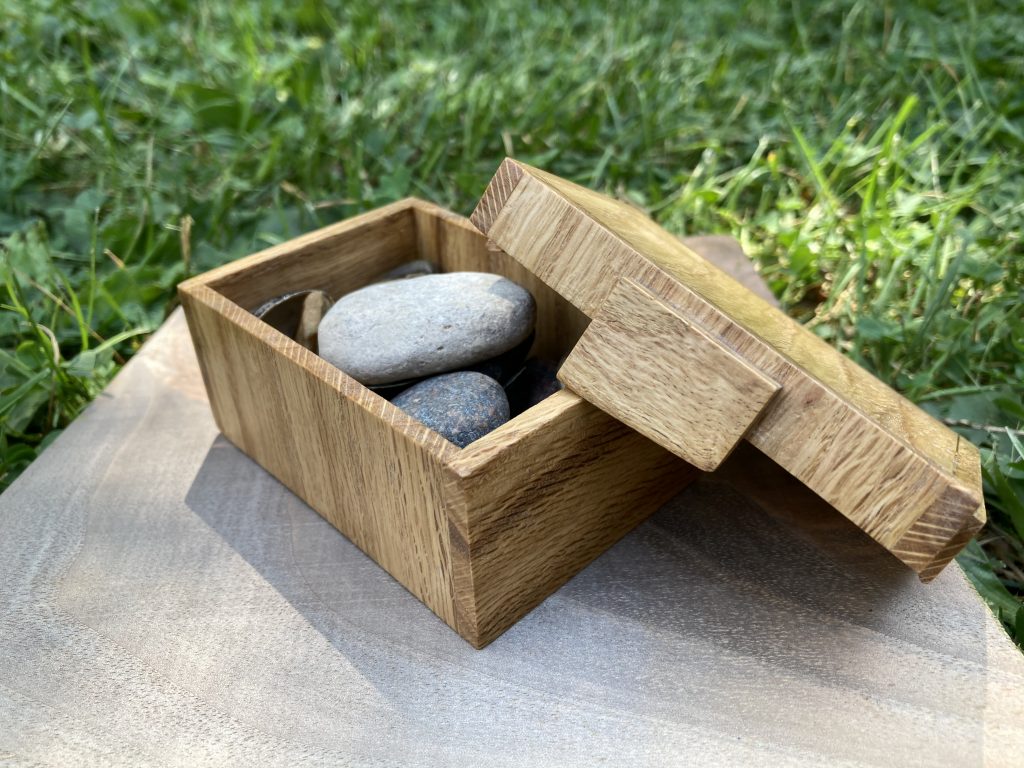

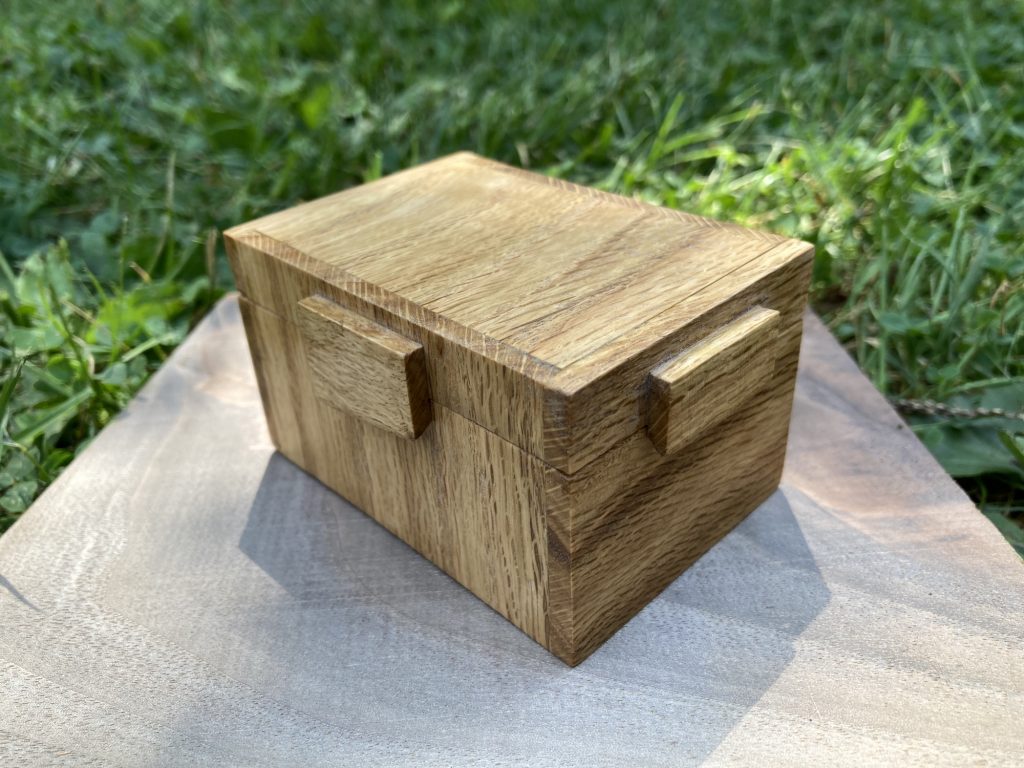
On Friday we went to the beach in Port Huron, MI and my daughter collected rocks and shells. The rest of the weekend I worked on making a small box for her to keep those treasures in. Final dimensions came out to about 3.25”x2.25”x2”. Materials were white oak and Titebond III. Finished with three-ish coats of shellac buffed to a satin finish with steel wool.
Pictures taken in every woodworking project’s natural environment: outside in the grass on top of a scrap of figured walnut.
A small box is much harder than a big box.
The boards for this were resawn on the band saw from a single piece of scrap wood and then planed down to roughly 1/4″ on a thickness planer. I wanted crisp mitered corners, but the small pieces kept tearing out on the table saw and, frankly, I was closer to the blade than I wanted to be for those cuts, so I settled for simple butt joints. Now that it’s all together I quite like the look of the exposed end grain all around it.
You make boxes like this by gluing it all up as a solid rectangular cuboid (aka “a box”) and then cut around four edges to pop the lid off. Cutting the lid off is moderately harrowing; however, the upshot is you get continuous grain from the base to the lid and that makes woodworkers happy.
After the lid was free there was another hour or two pairing down high spots and squaring everything up with a sharp chisel. Then another hour or two hand sanding everything smooth from 100-220.
The little jagged tabs that align the lid and let it stay snugly in place were made by snapping some offcuts off with a pair of pliers and then artfully sanding them down. It’s a fun look and gives the design some teeth. It’s very satisfying to pop the lid on and off. And you can fit the box in the upturned lid as well. An unintended affordance, but delightful!
A Dad Goal of mine is that my kids grow up with little handmade curiosities like this littered about the house. My daughter smiled when I gave it to her and said “I’m going to put it in my room!”